

How To Create A New Branch From Master
This browser is no longer supported.
Upgrade to Microsoft Edge to take advantage of the latest features, security updates, and technical support.
- Feedback
- Edit
Create a new Git branch
- Article
- 2 minutes to read
Thank you.
Azure Repos | Azure DevOps Server 2020 | Azure DevOps Server 2019 | TFS 2018-TFS 2017
Tip
Need help creating a new Git branch in your local repo from Visual Studio or the command line? Visit the Git tutorial.
Important
Users of TFS 2015 and previous won't have the Branches tab in the Code view. When using those versions, you can create a new branch in TFS from the Code view by selecting the dropdown list next to the branch name and then selecting New branch.
Create a new branch
- Browser
- Visual Studio
- Command Line
-
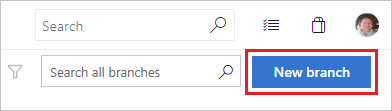
View your repo's branches by selecting Repos > Branches while viewing your repo on the web.

-
Select New branch in the upper-right corner of the page.
-
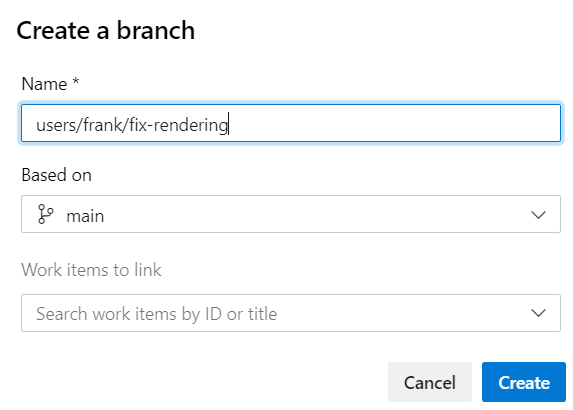
In the Create a branch dialog box, enter a name for your new branch, select a branch to base the work off of, and associate any work items.
-
Select Create branch.
-
View your repo's branches by selecting Branches while viewing your repo on the web.

-
Select New branch in the upper-right corner of the page.
-
In the Create a branch dialog box, enter a name for your new branch, select a branch to base the work off of, and associate any work items.

-
Select Create branch.
Tip
You will need to fetch the branch before you can see it and swap to it in your local repo.
Feedback
How To Create A New Branch From Master
Source: https://docs.microsoft.com/en-us/azure/devops/repos/git/create-branch
Posted by: wardacte1943.blogspot.com
0 Response to "How To Create A New Branch From Master"
Post a Comment